When you have registered and logged in, the next step is to either create, or join, a Team. To do this, you need to have either selected, or created, both a Space and an Organisation. For a description of Spaces, Teams and Organisations please see this page.
Would you like to join a Team?
You can join one or more existing Teams by:
Joining an existing Team immediately after registration
After registration, you will be prompted to either join or create a Team. When selecting to join, you can type to automatically search for the Team and candidates will appear which you can select. You can select up to 3 at one time. You can also browse, and join by requesting membership directly from a Team page (see below).
Once the Team(s) are selected, the process is the same as requesting membership directly from a Team page.
Requesting membership of an existing Team
If a Team has an administrator, and you are not already a member - then a request membership button will appear on the Team page. You can browse, filter and search Teams from the Browse menu at the top of the page.
After clicking this button, the Team will automatically be selected, and you then need to provide your Organization. Start to type the name of your Organization, and existing options will be displayed that contain the text you type (you can also type information related to the Organization such as city or country). Hopefully, your Organization is found, and you can just select it. If not, you can choose the top option to define a new one.
- Only the title is required for a new Organization, but you can also provide details about its website, city and country.
- You will be able to edit and add additional information afterwards.
Finally, you also have the option to provide a comment to describe why you wish to join the Team. This is particularly important if you are not already known by the Team administrator.
Once submitted, the administrators of the Team will be notified and will either approve or reject your request, and you will be notified by email.
Create your own Team
You will be prompted to create a Team when you register a new account. If you are already a member and wish to create additional Teams, you can choose to create one from the Create drop down menu in the top navigation bar. Here is a direct link.
The steps for creating a Team are outlined here:
- A
Spacewill first need to be chosen or created.
- By default, the site managed Space is selected (called
Independent Teams), but if unchecked there is an option to provide the title of a new one. - If you already administer an existing Space, a dropdown box will be shown instead allowing you to select it.
- Only the title is required at this stage, and further details can be added once the Team has been created.
- You next need to define the
Team. The minimum requirement is a Title, but you can also provide a:- Description, and
- Webpage URL
- You then need to define your Organization.
- Start to type the name of your Organization, and existing options will be displayed that contain the text you type (or information related to the Organization such as city or country).
- Hopefully, your Organization is found, and you can then select it, or
- If not, you can choose the top option to define a new one.
- Only a title is needed for a new Organization, but you can also provide details about its website, city and country. You will be able to edit and add additional information afterwards.
- Once submitted, relevant administrators will be notified. They will review and either accept or reject the new
Teamand / orSpace.
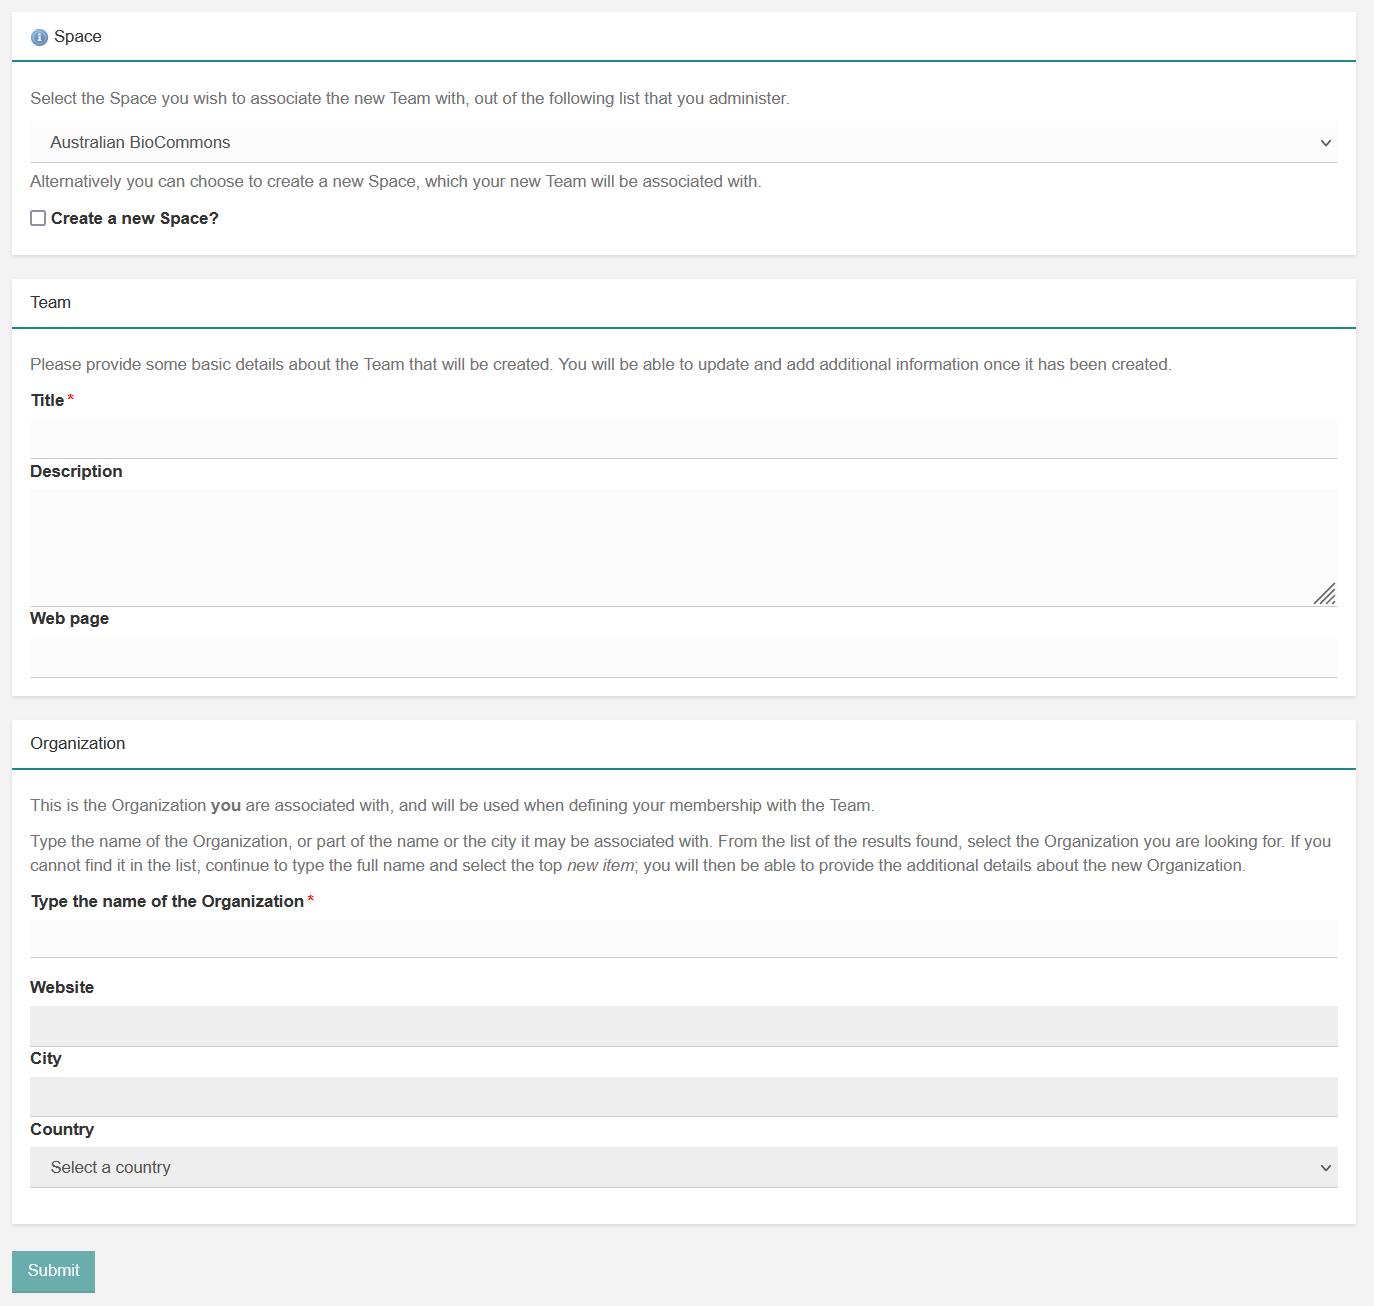
Fig 2. Wizard for creating spaces, teams and organizations.
Approval
If you are creating a Team within a Space you administer, then there is no approval step. You will be shown a page to review the details and then can create straight away.
Otherwise, the process is:
- An appropriate administrator will be notified by email, and via WorkflowHub itself, about your request,
- In WorkflowHub, they will be shown a page that allows them to quickly review the details and either accept or reject the request, and
- In either case you will be notified by email. During the working day (according to the timezone of the member notified) this will normally be a quick process.