Once you have either clicked on the Contribute button, or selected Workflow from the Create drop down menu at the top of the page, a wizard will present four options for registering a workflow and its associated files:
- Upload / import a local file
- Upload / import using a remote file URL
- Importing a Git repository
- Upload / Import a Workflow Research Object Crate (RO-Crate)
Tip: It is recommended to import from a remote URL or Git repository (including remote RO-Crates), as WorkflowHub is intended to be a hub for finding workflows, not an archive for storing them.
Upload / import a local file
- Select your local workflow file using the
Browse…button - Pick your workflow type - if your workflow type is not included in the list you can select
Otheror add aNew workflow typeusing the available button. - Optional: add in a Abstract CWL using the
Browse…button - Optional: add in a Diagram file using the
Browse…button - Click the
Registerbutton
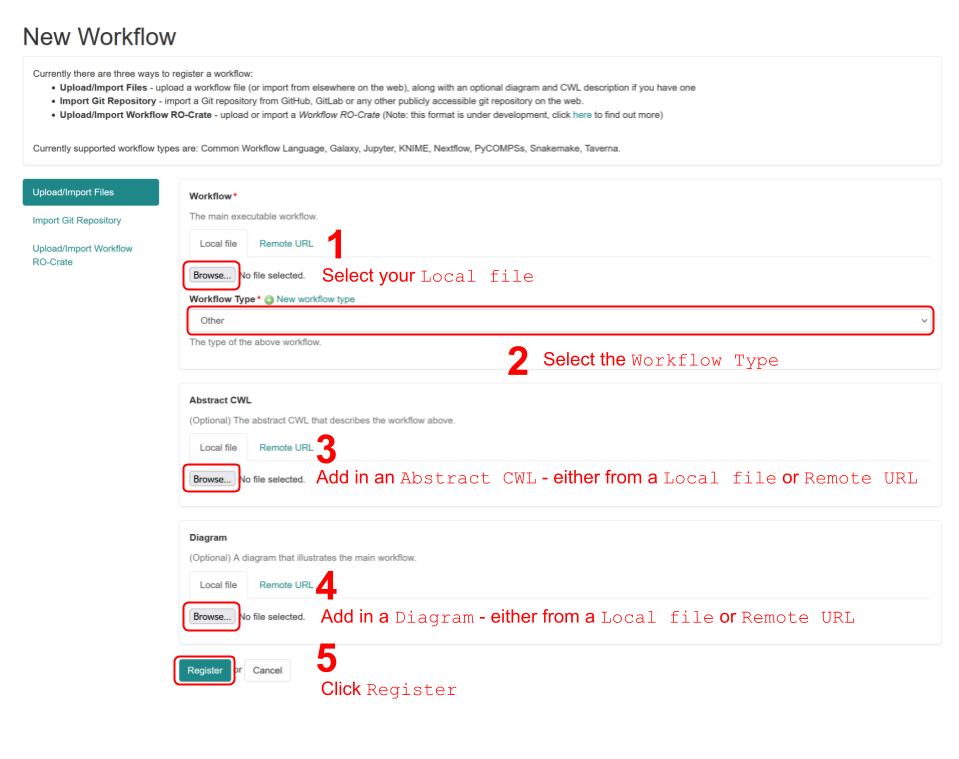
Fig 2. New workflow tab for uploading / importing local files.
Upload / import using a remote file URL
- Add your remote file URL - click
Testto check the URL - Pick your workflow type - if your workflow type is not included in the list you can select Other or add a
New workflow typeusing the available button. - Optional: add a remote URL for the Abstract CWL - click
Testto check the URL - Optional: add a remote URL for the Diagram file - click
Testto check the URL - Click the
Registerbutton
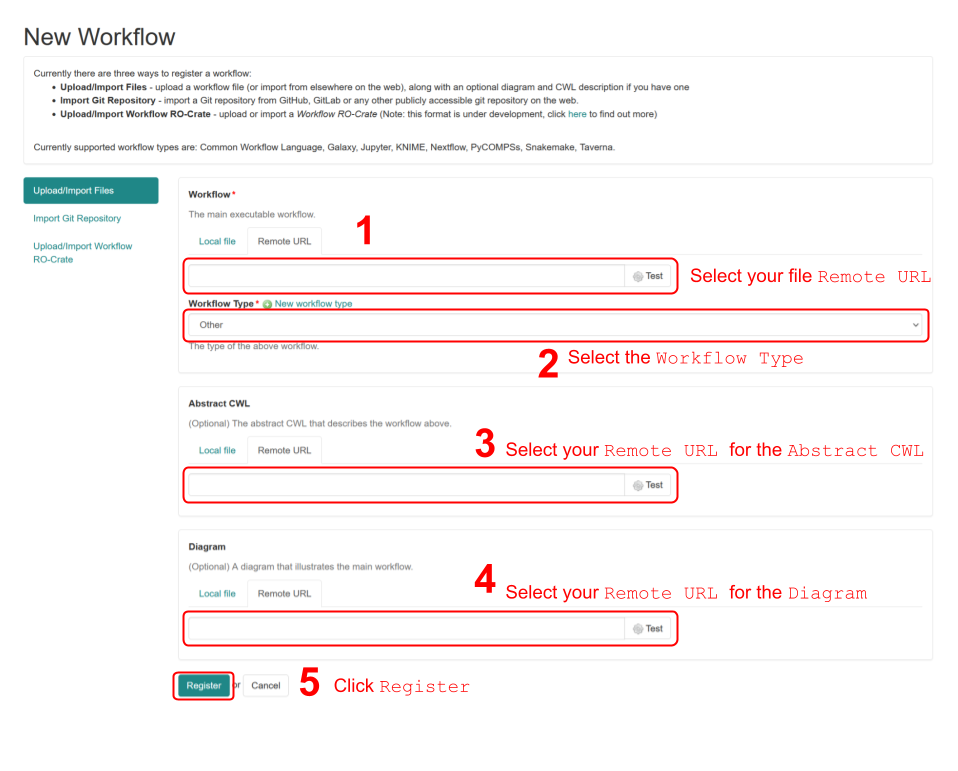
Fig 3. New workflow tab for importing files from a remote URL.
Importing a Git repository URL
- Add your Git repository URL e.g.
https://github.com/username/repository_name - Click the
Registerbutton
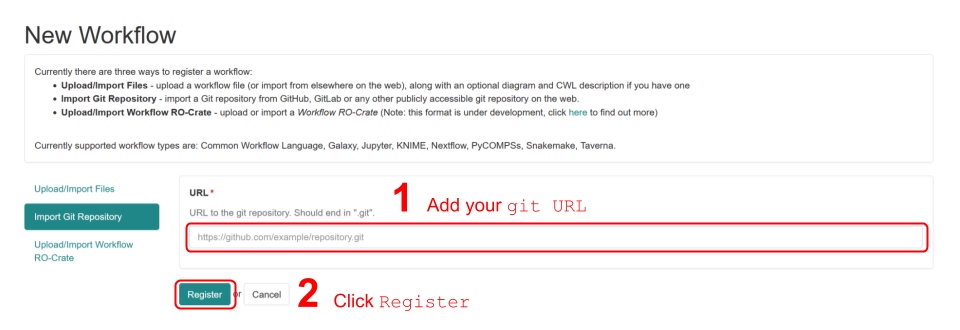
Fig 4. New workflow tab for importing files from a git repository (e.g. GitHub, GitLab).
- When you have selected to import a specific Git repository URL (i.e. by clicking
Register) you will be prompted to specify either a repository:- Branch, or
- Release tag
- Once you click
Registeragain, you will gain access to a drop down list of the files in the repository - pick themain executable workflow file:- For a NextFlow workflow for example, this would be the
.nffile - For a series of bash scripts, this would be the first
.shfile or theREADME.mdfile
- For a NextFlow workflow for example, this would be the
- You can now pick additional optional files as well:
- Click
Continueto proceed to the metadata stage
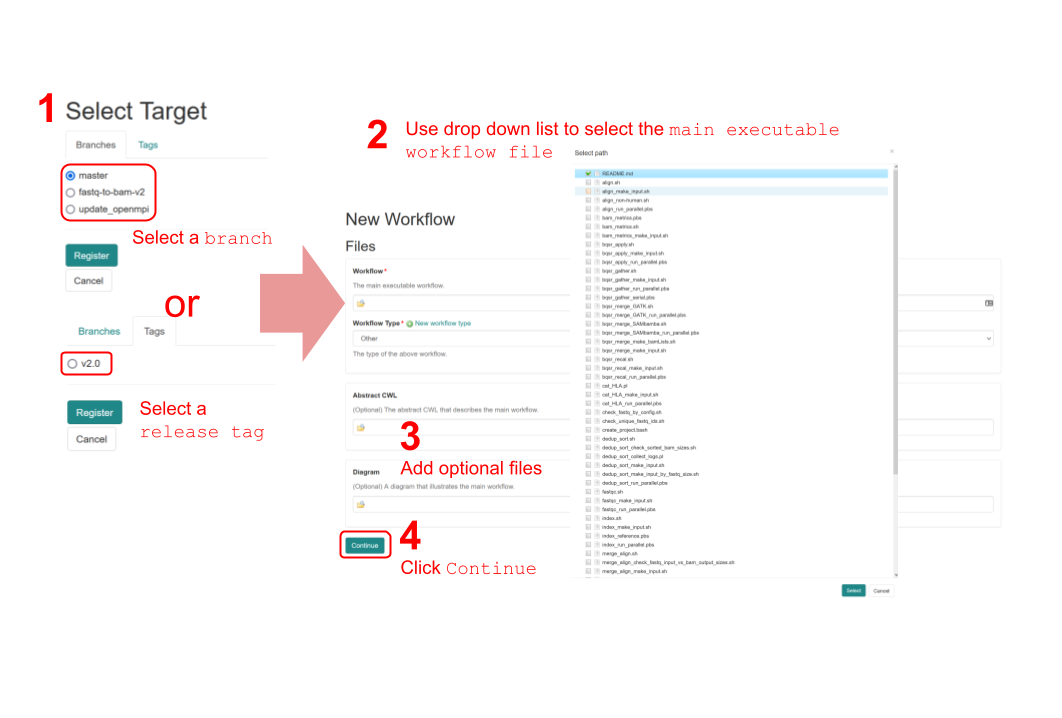
Fig 5. Selecting a target branch or release tag as well as the main executable and optional files during Git repository import.
Upload / Import a Workflow RO-Crate
- Add an RO-Crate zip file, either via:
- A local file upload using the
Browse…button, or - By adding a remote file URL - click
Testto check the URL
- A local file upload using the
- Click the
Registerbutton
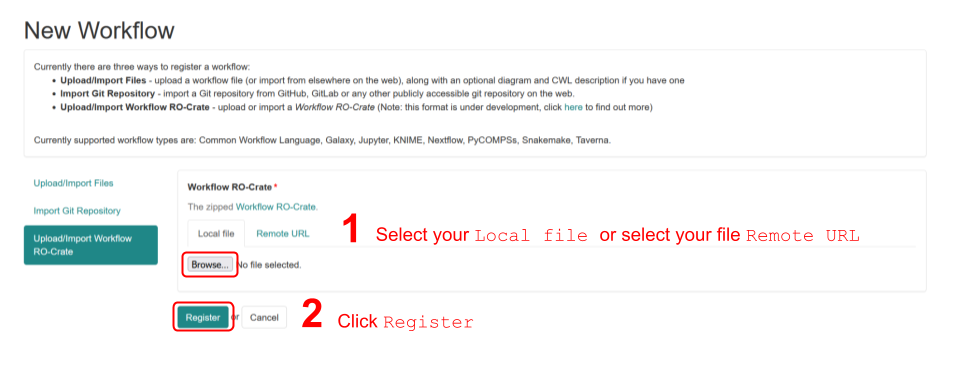
Fig 6. New workflow tab for importing files using a Research Object Crate (RO-Crate).